About Me

My photo
gwblaine (at) gmail (.) com

Pages

Search This Blog

A place to post mostly Guitar related stuff. Mods, Customization, Hot Rodding, Schematics, Wiring Diagrams, Ground up builds, Amps & Other Ideas

Squier, Master Series, Esprit

Squier, Master Series,  Esprit
My #1 Crimson Transparent [Can't Stop Playing This Guitar]

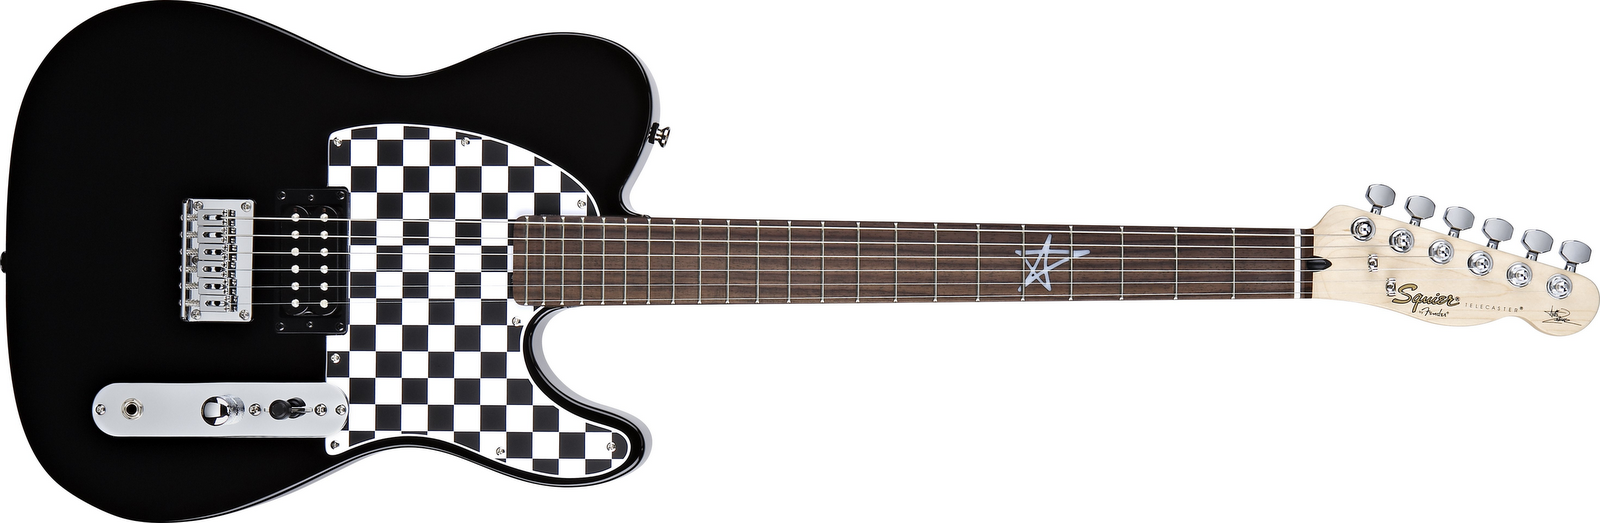
Squier, Avril lavigne, Telecaster

Squier, Avril lavigne, Telecaster
Single Humbucking Tele What all of the SHPR-1 Wiring diagrams are for.

Tuesday, January 12, 2010

Variable Tone Coils With Variable Noise Canceling Coil - redux


Seymour Duncan SHPR-1 (P-Rails)

R1A, R1B = Volume, Shunt Circuit
R2A, R2B = Tone
R3 = Blender, Shunt Circuit for Variable Noise Canceling Coil SC1
R4A, R4B = Blender for Variable Tone Coils TC1 & TC2
S1 = Single, Humbucker, Single (South Coil=P90, Both Coils, North Coil=Blade)
S2 = Series-Parallel

*********************************************

Gemini, Pro Audio, DJ Equipment

Hello All.

A Review.

Gemini PA-7000 Preamp

This is not so much of a review of the PA-7000 Preamp as it is of Gemini the company.

To make a long story short, I got took on ebay.
The Person advertised the PA-7000 as "Used", but never taken out of the box.
"As Is", No Returns He says, well that should have been a clue.
A deal to good to pass up, I should have Passed.
Seems He palmed off his shipping damage to who ever bought it, Me.

Oh Well, live & learn.

**********************************

eBay page states that the item will be shipped via "UPS"
It arrived via the US Postal Service, uninsured.

Received 9 days later.
It arrived in it's "Paper Box"
Wrapped in a "Brown Grocery Bag"

The Bag was torn in several places.
The "Paper Box' was "Crushed' and had several "Holes" in it.

**********************************
My Day Job: Electronics Technician
**********************************

Removed the PA-7000 from the Box.
Removed the PA-7000 from the Plastic Bag.
Inspecting the PA-7000, From Left to Right:

1. The Faceplate:
Has several very slight "Warps" to it, both "In & Out"
It also has a few "Nicks" in it along the top edge.

2. The Power Switch:
Looks Ok, it Toggles.

3. The Phono Jack;
Looks Ok.

4. The Microphone Jack:
Looks Ok.

5. The Mic Level Knob:
Has the paint scuffed off on one edge.

6. The Bass Knob:
Has a deep gouge in it and was pushed all the way down making contact with the Faceplate and would not turn.

7. The Mid Knob:
Has a deep gouge in it and was pushed "Up" the top edge of the knob making contact with the Faceplate and would not turn. The bottom edge of the knob in contact with the Faceplate was Flatted and bent under.

8. The Treble Knob:
Has a scuffed up Face with missing paint, but will turn.

9. The Balance Knob:
Looks Ok, and turns.

10 The Volume Knob:
Has a scuffed up Face with missing paint, but will turn.

11, 12, 13, 14. The Mono, Mute, Low Cut and Loudness Buttons:
All look Ok, all push in & out.

15. The Selector Knob:
Looks Ok, and turns.

16. The Tape Monitor button:
Looks Ok, and pushes in & out.

**********************************

Put the PA-7000 on the work bench.
Pulled all of the knobs off.
Removed the nuts holding the potentiometers.
Removed the faceplate, left the power switch in the Faceplate.

Hooked it up to my test equipment.
The PA-7000 Powers Up & Down OK.
Ran a sweeping wave (1KHz to 100KHz) @1Vp-p
Tested all inputs.
Tested all outputs.
Output looks good on the Scope.
I get the "Sweeping Buzz" from the loudspeakers.


--- * --- * ---
The Mid knob:
The collar that the control shaft goes through is bent "UP"
And will only turn to the left (Counter-Clock Wise).
In so much as it does turn, it still has an effect on the audio signal.
But needs to be replaced.
The circuit on the board proper seems to be OK and working.

The "HIT" on the knob does not seem to have made it into the chassis.
And does not seem to have "Damaged" the board itself.
--- * --- * ---


The Rest Of The Controls:
All seem to be working on the bench.
Once I replace the "Mid' potentiometer.
I will have to run a "Real" audio signal through it as a final test.

All Of The Knobs Will Have To Be Replaced.
The "Mid' knob Is ruined (busted).
The rest of the knobs have cosmetic issues.

------------------------------------------------------------------------------------------------

Replaced Mid knob.
Hooked up mu MP3 player to the PA-7000 to each input.
All inputs working, all outputs working.
Overall build quality of the circuit board was not all that impressive.
As a preamp the PA-7000 seems to be a somewhat useable piece of equipment.

------------------------------------------------------------------------------------------------

And here is the rub !!!!!!!!!!!!!!!!!!!!!!!!!!!!!!!!!!!!!!!!!!!!!!!!!!!!!

I have emailed Gemini 3 times, Absolutely no response!!!!!!!!!!!!!!!!!!!!!

All I wanted to know was if they would sell me some new knobs.
Or tell me where I could get the knobs.

I emailed Sales.
I emailed Tech support, twice.

Nada, Diddly Squat, Nope, Nothing, A Bunch of Deader's.

Sure does not inspire any warm and fuzzy feelings about Gemini.
I know I will never purchase any Gemini products again.


*******************************************************************************

Friday, December 4, 2009

Four Pole, Four Throw (4P4T) Rotary Switch


Lead:
2 GFS L'Killers @15K each
4P4T Rotary Switch on the lead pickup with a Phase Switch
2 Series/Parallel Switches

Rythm:
1 Seymour Duncan SHPR-1 P-Rail
1 South-Coil/Humbucker/North-Coil Switch
1 Series/Parallel Switch
Variable Tone Coils
Variable Noise Canceling Coil

Output:
Stereo TRS Jack
DP3T On-On-On Pickup Select Switch
Stereo-Mono Switch With Transformer Coupled Output

Variable Tone Coils With Variable Noise Canceling Coil


Seymour Duncan SHPR-1 (P-Rails)

R1 = Volume
R2 = Tone
R3 = Variable Noise Canceling Coil
R4 = Variable Tone Coils
S1 = Single, Humbucker, Single
S2 = Series-Parallel

Sunday, October 18, 2009

Series Noise Canceling (Sensing) Coil

SC1 = Series Noise Canceling Coil
R3 = Blender, Shunt Control for SC1

Seymour Duncan SHPR-1 P-Rails

Hello World

I have got to get me some of these!
I can wire hack them till Dooms-Day and get thousands of sounds from these bad boys.
There would be so many switches & pots sticking out of this thing that there would be no room left for the pickups and the strings.

As is, One "69 Thinline" with one humbucker route.
1 P-Rail, 3 Switches, 2 Pots, 1 Dummy coil, 2 Tone Coils(chokes).

I'll be ready to Rock-N-Roll!

Thursday, May 29, 2008

Way Major New Toy

Hello World

Another G.A.S. attack!!!
Bought another Jay Turser JT-134DC, "Vintage Burst" this time.
Amber Center fading to Black at the edges.
Fretboard Inlays: Rectangular with Triagle insets (regular stuff).
Same specs and options as the rest of my JT-134DC's.

Needs some Fret work, 5th. & 6th. String Dead @22nd. fret.
Minor buzzing way up there, from 17th. to 20th. fret.
But hey! for $200 are you kidding!!!, I do my own fret work, so no big deal.
To me these things sound ever so sweet.


Well, For Now.
Rock On !!!

Tuesday, March 18, 2008

G.A.S. Ouch!!! That Hurts!!!

Hello World


2 new toys!


Toy #1:
Squier Vintage Modified Telecaster Thinline, Gold
Rock-&-Roll, Hot Damn this things is nice.
It is still not a Fender '69 Thinline.
Bt it sure beats the heck out of any of the Thinline clones I have tried in the past.


Toy #2:
Jay Turser JT-134DC
My 2nd. one of these!
Great Semi-Hollows.
Same size as a Gibson CS-336.
Flame Maple Top.
Maple Back, Sides & Center Block.
Mahogany Neck, 1 & 5/8" Nut.
Transparent Gloss Black, Gold Hardware
Vine Inlay on fretboard (somewhat cheesy but I like it).
String her up with a set of GHS 0.011 Boomers.
And Wail !!!!!!!!!!!!!!!!!!!!!!!!!!!!!!!!!!!!!!!!!!!!!!!!!!!!!!!!!!!!!!!!!!!!!!!!!!!!!!!!!!!!!!!!
This is another one of those guitars I cannot seem to put down.
It just makes me want to play & play & play.


No progress on the "Second Coming" of the "Super-L"
I have bought all of the Hardware, Switches and Router bits.
Now I just have to get two new L'Killer Pickups


That's it for Now
Rock On !!!

Wednesday, January 9, 2008

Day Job Kicked In !!!

Hello World

The Day Job Kicked In !!!

Not much new to tell at present, still need to get two(2) new Li'Killers @15K and make a second attempt at my Super-L.

New Items In The Guitar Rig:
#1... "Behringer RX1202FX" Mixer, Rack Mount, 8 Mono Channels, 2 Stereo Channels.
#2... "Samson D2500" Digital Stereo Graphic EQ.
----------This thing is "Killer" or is that "To Die For"
----------This thing has 99-Memory locations that can be called up W/Midi controller
----------Any two(2) ways about it, I wish I bought a Graphic EQ ages ago.
#3... "Behringer DSP1424P" Sonic Enhancer.
----------Basically a Two(2) Band "Hi/Low Compressor.

Signal Path:
Guitar (1) > GNX4 (2) > RX1202FX (3) > D2500 (4) > DSP1424P (5) > Amp (6) > Speakers (7)
(1) Mono Out >
(2) Mono In - Stereo Out >
(3) Channels 1 & 2 In - Stereo Out >
(4) Stereo In - Stereo Out >
(5) Stereo In - Stereo Out >
(6) Stereo In - Stereo Out >
(7) Stereo In - Loud Out >>>

With the D2500 I tweak my tone till the "Cows Come Home"

One thing though!
Tweaking anything above 600Hz or so starts to get overly pronounced(Loud?).

Single notes are GREAT!!!!!!!!!!!!!!!!!!!!!!!!!
But cords tend to be Somewhat Overbearing.

Enter One DSP1424P, Programmable Sonic Enhancer.
I can set the High Frequency Compression Point.
I can set the Low Frequency Compression Point.
And the Crossover Frequency.
Input Gain.
Output Gain.
I can program the Left & Right channels separately.

Well, That all for today.


Until Next Time
Rock On!!!

Wednesday, December 12, 2007

My Newest Toy/Noise Maker

Hello World

I have bought a Digitech GNX4.
Woah!
Kink-O-Matic!!!
This is way too much fun!
Should have done this much earler!

Was going to buy a Zoom G9.2tt, and I am still planing to do so.

But the 8-Track recorder and onboard Drum Machine was to good to pass up.

Next!!!!!!!!!!!!!!!!!
I will have to get the "Supermodels" for he GNX4, then Keyfax's Drum loops.


Untill Next Time
Rock On !!!

Thursday, November 8, 2007

Humbucker Covers

Hello World

One more piece of info!
The SuperL “MUST” have a Cover on it.
It will be too Exposed and open to Physical Abuse.
Especially as I Play "Right On Top" of the Lead pickup.


Rock On!!!

Well Dang!!! Busted Both Of Them

Hello World

In the process of trying to mod the Li'Killer's I managed to destroy them.
More than the "Silly Little Tab" has to be removed.

The "Wing" at either end of the pickup that the pickup height screws go into also have to be removed. At the base of each 'Wing' are "2 Eyelets" that the "Leads" from the coil winding are soldered into. These "Eyelets are directly in line with the "Edge" of the Humbucker cover and will short out the coils.

The "leads" come off of each end of the winding and go straight down into a metal eyelet in the fiber base. The fiber base is epoxyed to the bottom of the Coils. While in the process of trying to remove the fiber base I cut off the "Leads".

Result!
One Dead Coil Winding!
Pickup #1 DEAD!

Tried to dissemble the 2nd. Li'Killer.
Same result!
Pickup #2 DEAD!
Damn!!!

Boy! I am so glad these are not super expensive pickups.
But Still, This is a $50 lesson.

OK!
Time to buy "Two New" pickups and start over.
Hopefully!
I have learned how to disassemble the Li'Killer's.
Without "Killing" them!

Procedure:
1... Find "South Pole" of pickup and mark for future reference.
2... Remove Outer layer of tape that goes around both coils.
3... Remove layer of "Copper Tape", the "Ground" lead is soldered to this.
4... Desolder Wiring harness from Eyelets & Remove.
5... Desolder "Coil Winding Leads" from Eyelets.
!!!-VERY CAREFULLY-!!!
6... Tape "Coil Winding Leads" to body of coil.
!!!-VERY CAREFULLY-!!!
7... W/Exacto Knife, Cut fiber base from pickup.
(I am not so much worried about my fingers as I am concerened about Hacking up the coil wires)
8... remove Eyelets from fiber base.
! - With very small hobby saw:
9... Cut off "Side Tab"
10.. Cut off 'End Wings"
This will leave you with a rectangular fiber base with a rectangular hole in it.

There will be more info later as I figure it all out as I go.
WEEEEEEEEEEEEEEEEEEEEEEEEEEEEEEEEEEE!!!!!!!!!!!!!!!!


Rock On!!!

GNX4

GNX4
You Gotta Get This !!!

The SuperL

The SuperL
Schematic

SuperL Installed W/L-500

SuperL Installed W/L-500
Schematic

More Detail #1

More Detail #1
On/On/On Switch & Jacks

On/On/On Switch

On/On/On Switch
stewmac.com

SuperL Bits & Pieces

SuperL Bits & Pieces
2 Dual Blade Single-Buckers

Zoom G9.2tt

Zoom G9.2tt
My Next G.A.S. Attack