About Me

My photo
gwblaine (at) gmail (.) com

Pages

Search This Blog

A place to post mostly Guitar related stuff. Mods, Customization, Hot Rodding, Schematics, Wiring Diagrams, Ground up builds, Amps & Other Ideas

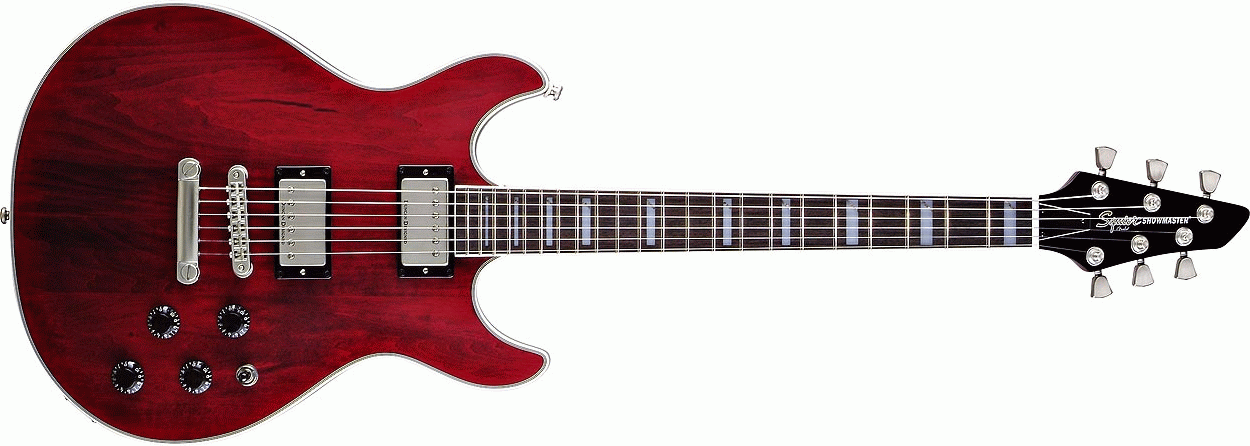
Squier, Master Series, Esprit

Squier, Master Series,  Esprit
My #1 Crimson Transparent [Can't Stop Playing This Guitar]

Squier, Avril lavigne, Telecaster

Squier, Avril lavigne, Telecaster
Single Humbucking Tele What all of the SHPR-1 Wiring diagrams are for.

Saturday, February 6, 2010

Squier, Avril lavigne, Telecaster

Squier, Avril lavigne, Telecaster

What all of the SHPR-1, P-Rails, Hot Lead wiring diagrams are for.

I have all ways wanted a Single Humbucker guitar.
I had never heard of Avril Lavinge!
Untill I started searching for a '69 Tele Thineline.

This little bugger caught my eye.
That "Silly Pickguard' has got to go.
I'll Swap it out for a "Black Pearl" Esquire pickguard from WD Msic.

The Tone (Noise Canceling) Coil:
Is going under the pickguard right in front of the Lead pickup.
The body will have to be routed out for the Tone Coil.
The Tone Coil route cavity should be shielded.
The Tone Coil should be darn near touching the back of the pickguard.
The pickguard should have !-!-!_NO_!-!-! shielding on it.
Aluminum, Copper, Spray on, or other wise.
*************************************************************************


*************************************************************************
Other Mods: Maybe?
1... Black Bridge (Hip Shot).
2... Black Tuners.
3... Black Control Plate.
4... Move Output Jack around back with a "Strat" Recessed Jack Plate.
5... Black "Beauty Ring" around Pickup.
--- As I play "Right On Top" of the Bridge pickup.
--- This will keep me from destroying the pickup.
--- I have done so in the past.
--- As I have used these before.
--- they do not affect the sound as much as you would think.
--- because of the "Open Face" design.
*************************************************************************


*************************************************************************


*************************************************************************


****************************************************************************

A Variable, Switchable, Tone/Noise Canceling Coil


*********************************************
P1 = Seymour Duncan SHPR-1 (P-Rails)

*********************************************
R1 = Volume, Audio Taper, (Shunt Circuit)
R2A, R2B = Tone, Linear Taper
R3A, R3B = Blender, Audio Taper
--- Shunt Circuit for Variable Tone/Noise Canceling Coil "TC1"
--- R3A is wired up "Clockwise"
--- R3B is wired up "Counter Clockwise"

*********************************************
TC1 = Dual, 10K Coil
--- Humbucker pickup without magnet(s).
--- It does have the "Slugs & Screws" installed

*********************************************
S1 = Coil Select
--- Single, Humbucker, Single
--- South Coil(P90), Both Coils, North Coil(Blade)
S2 = Pickup, Series-Parallel
S3 = Tone Coil, On-Off
S4 = Tone Coil, Series/Parallel

*********************************************
This setup give you 3-Pots and 4-switches.

R1 & R2 are standard pots with standard sized knobs.
S2 & S2 are large "Fat Bat" switches.

R3A&B is a Mini Pot with Mini Knob.
S3 & S4 are "Mini" toggle switches.

*********************************************

Wednesday, January 27, 2010

Variable, Switchable, Tone/Noise Canceling Coils (rev-001B)


*********************************************
P1 = Seymour Duncan SHPR-1 (P-Rails)

*********************************************
R1 = Volume, Audio Taper, (Shunt Circuit)

R2A, R2B = Tone, Linear Taper

R3A, R3B = Blender, Audio Taper
--- Shunt Circuit for Variable Tone/Noise Canceling Coil "TC1"
--- R3A is wired up "Clockwise"
--- R3B is wired up "Clockwise"

*********************************************
TC1 = 10K Coil
--- Single coil pickup without a magnet
--- It does have the "Nickle Slugs/Nickle Bar" installed

TC2 = 10K Coil
--- Single coil pickup without a magnet
--- It does have the "Nickle Slugs/Nickle Bar" installed

*********************************************
S1 = Coil Select
--- Single, Humbucker, Single
--- South Coil(P90), Both Coils, North Coil(Blade)

S2 = Pickup, Series-Parallel

S3 = Tone Coil, On-Off


*********************************************
This setup give you 3-Pots and 2-switches.

R1 & R2 are standard pots with standard sized knobs.
S2 & S2 are large "Fat Bat" switches.

R3A&B is a Mini Pot with Mini Knob.
S3 & S4 are "Mini" toggle switches.

*********************************************

Tuesday, January 26, 2010

A Single, Variable, Switchable, Tone/Noise Canceling Coil (rev-0004A)


*********************************************
P1 = Seymour Duncan SHPR-1 (P-Rails)

*********************************************
R1 = Volume, Audio Taper, (Shunt Circuit)
R2A, R2B = Tone, Linear Taper
R3A, R3B = Blender, Audio Taper
--- Shunt Circuit for Variable Tone/Noise Canceling Coil "TC1"
--- R3A is wired up "Clockwise"
--- R3B is wired up "Counter Clockwise"

*********************************************
TC1 = 10K Coil
--- Single coil pickup without a magnet
--- It does have the "Nickle Slugs/Nickle Bar" installed

*********************************************
S1 = Coil Select
--- Single, Humbucker, Single
--- South Coil(P90), Both Coils, North Coil(Blade)
S2 = Pickup, Series-Parallel
S3 = Tone Coil, On-Off
S4 = Tone Coil, Series/Parallel

*********************************************
This setup give you 3-Pots and 4-switches.

R1 & R2 are standard pots with standard sized knobs.
S2 & S2 are large "Fat Bat" switches.

R3A&B is a Mini Pot with Mini Knob.
S3 & S4 are "Mini" toggle switches.

*********************************************

Tuesday, January 12, 2010

Variable Tone Coils With Variable Noise Canceling Coil - redux


Seymour Duncan SHPR-1 (P-Rails)

R1A, R1B = Volume, Shunt Circuit
R2A, R2B = Tone
R3 = Blender, Shunt Circuit for Variable Noise Canceling Coil SC1
R4A, R4B = Blender for Variable Tone Coils TC1 & TC2
S1 = Single, Humbucker, Single (South Coil=P90, Both Coils, North Coil=Blade)
S2 = Series-Parallel

*********************************************

Gemini, Pro Audio, DJ Equipment

Hello All.

A Review.

Gemini PA-7000 Preamp

This is not so much of a review of the PA-7000 Preamp as it is of Gemini the company.

To make a long story short, I got took on ebay.
The Person advertised the PA-7000 as "Used", but never taken out of the box.
"As Is", No Returns He says, well that should have been a clue.
A deal to good to pass up, I should have Passed.
Seems He palmed off his shipping damage to who ever bought it, Me.

Oh Well, live & learn.

**********************************

eBay page states that the item will be shipped via "UPS"
It arrived via the US Postal Service, uninsured.

Received 9 days later.
It arrived in it's "Paper Box"
Wrapped in a "Brown Grocery Bag"

The Bag was torn in several places.
The "Paper Box' was "Crushed' and had several "Holes" in it.

**********************************
My Day Job: Electronics Technician
**********************************

Removed the PA-7000 from the Box.
Removed the PA-7000 from the Plastic Bag.
Inspecting the PA-7000, From Left to Right:

1. The Faceplate:
Has several very slight "Warps" to it, both "In & Out"
It also has a few "Nicks" in it along the top edge.

2. The Power Switch:
Looks Ok, it Toggles.

3. The Phono Jack;
Looks Ok.

4. The Microphone Jack:
Looks Ok.

5. The Mic Level Knob:
Has the paint scuffed off on one edge.

6. The Bass Knob:
Has a deep gouge in it and was pushed all the way down making contact with the Faceplate and would not turn.

7. The Mid Knob:
Has a deep gouge in it and was pushed "Up" the top edge of the knob making contact with the Faceplate and would not turn. The bottom edge of the knob in contact with the Faceplate was Flatted and bent under.

8. The Treble Knob:
Has a scuffed up Face with missing paint, but will turn.

9. The Balance Knob:
Looks Ok, and turns.

10 The Volume Knob:
Has a scuffed up Face with missing paint, but will turn.

11, 12, 13, 14. The Mono, Mute, Low Cut and Loudness Buttons:
All look Ok, all push in & out.

15. The Selector Knob:
Looks Ok, and turns.

16. The Tape Monitor button:
Looks Ok, and pushes in & out.

**********************************

Put the PA-7000 on the work bench.
Pulled all of the knobs off.
Removed the nuts holding the potentiometers.
Removed the faceplate, left the power switch in the Faceplate.

Hooked it up to my test equipment.
The PA-7000 Powers Up & Down OK.
Ran a sweeping wave (1KHz to 100KHz) @1Vp-p
Tested all inputs.
Tested all outputs.
Output looks good on the Scope.
I get the "Sweeping Buzz" from the loudspeakers.


--- * --- * ---
The Mid knob:
The collar that the control shaft goes through is bent "UP"
And will only turn to the left (Counter-Clock Wise).
In so much as it does turn, it still has an effect on the audio signal.
But needs to be replaced.
The circuit on the board proper seems to be OK and working.

The "HIT" on the knob does not seem to have made it into the chassis.
And does not seem to have "Damaged" the board itself.
--- * --- * ---


The Rest Of The Controls:
All seem to be working on the bench.
Once I replace the "Mid' potentiometer.
I will have to run a "Real" audio signal through it as a final test.

All Of The Knobs Will Have To Be Replaced.
The "Mid' knob Is ruined (busted).
The rest of the knobs have cosmetic issues.

------------------------------------------------------------------------------------------------

Replaced Mid knob.
Hooked up mu MP3 player to the PA-7000 to each input.
All inputs working, all outputs working.
Overall build quality of the circuit board was not all that impressive.
As a preamp the PA-7000 seems to be a somewhat useable piece of equipment.

------------------------------------------------------------------------------------------------

And here is the rub !!!!!!!!!!!!!!!!!!!!!!!!!!!!!!!!!!!!!!!!!!!!!!!!!!!!!

I have emailed Gemini 3 times, Absolutely no response!!!!!!!!!!!!!!!!!!!!!

All I wanted to know was if they would sell me some new knobs.
Or tell me where I could get the knobs.

I emailed Sales.
I emailed Tech support, twice.

Nada, Diddly Squat, Nope, Nothing, A Bunch of Deader's.

Sure does not inspire any warm and fuzzy feelings about Gemini.
I know I will never purchase any Gemini products again.


*******************************************************************************

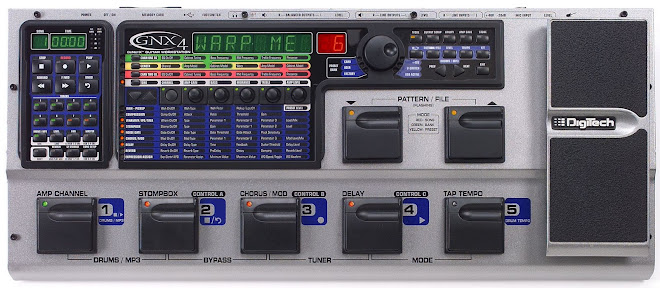
GNX4

GNX4
You Gotta Get This !!!

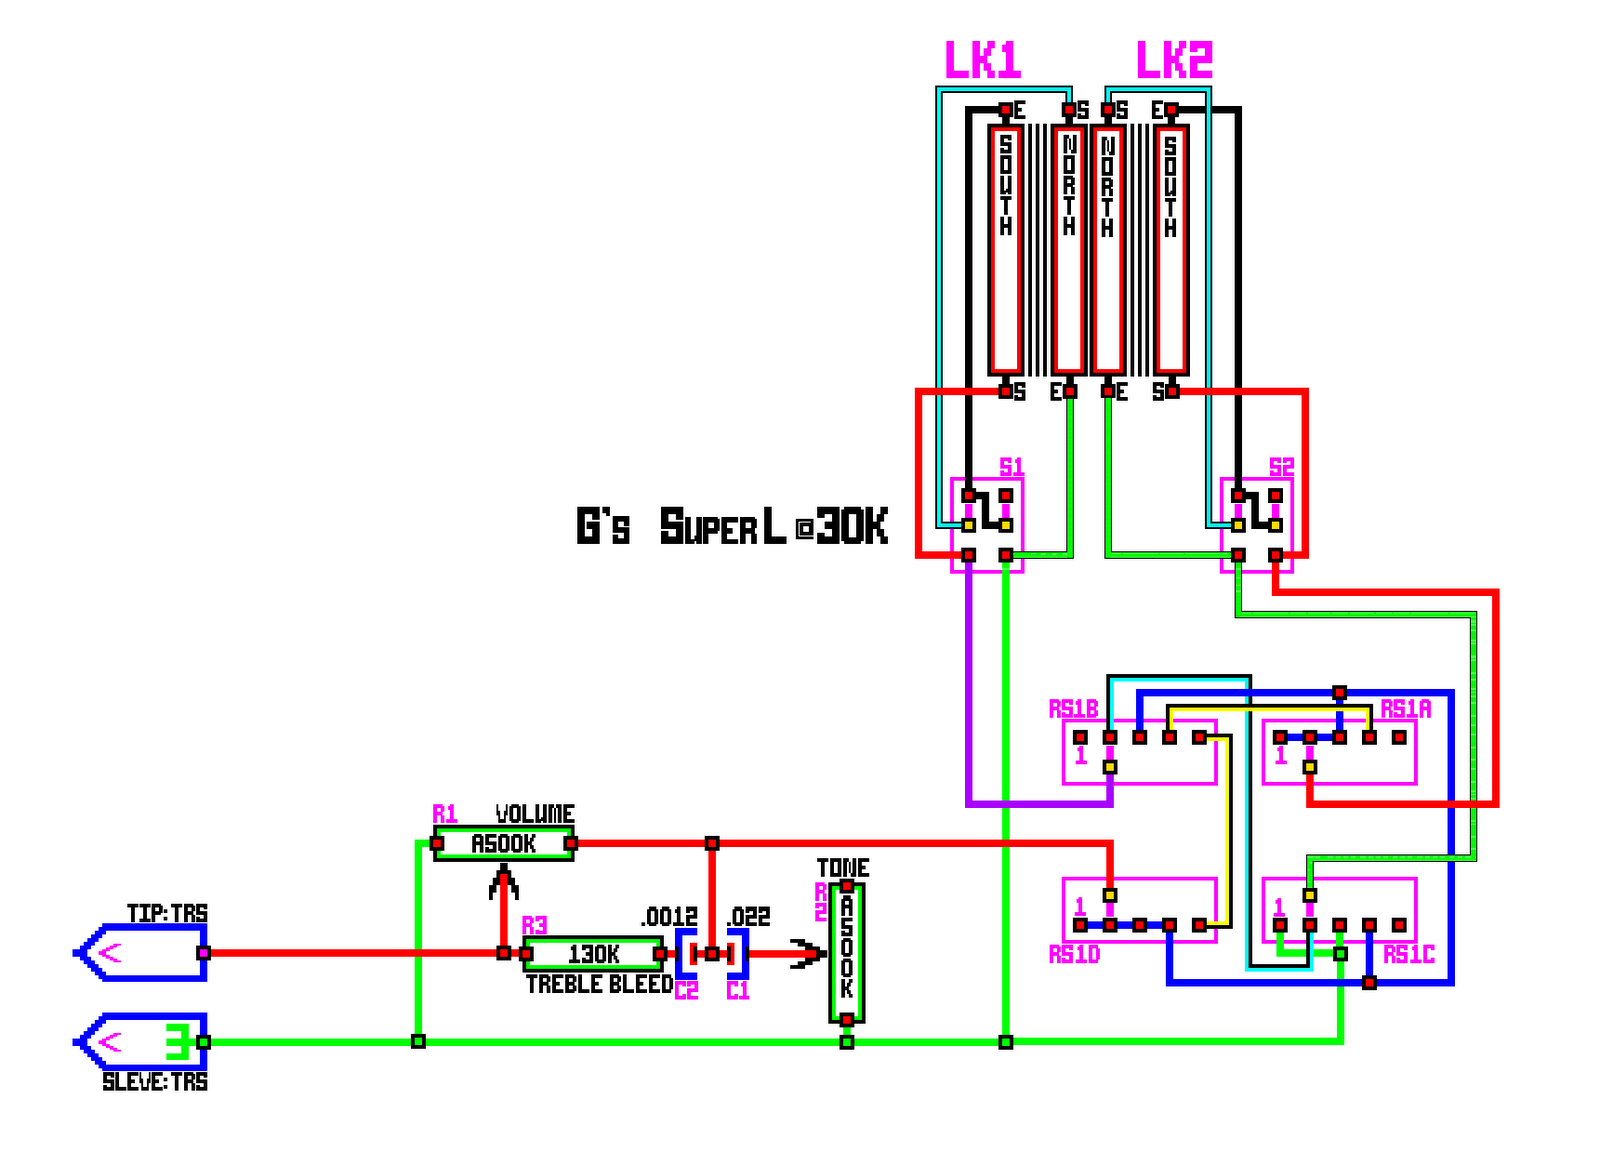
The SuperL

The SuperL
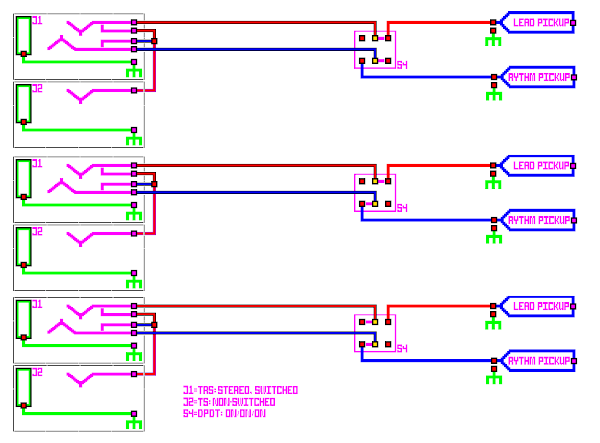
Schematic

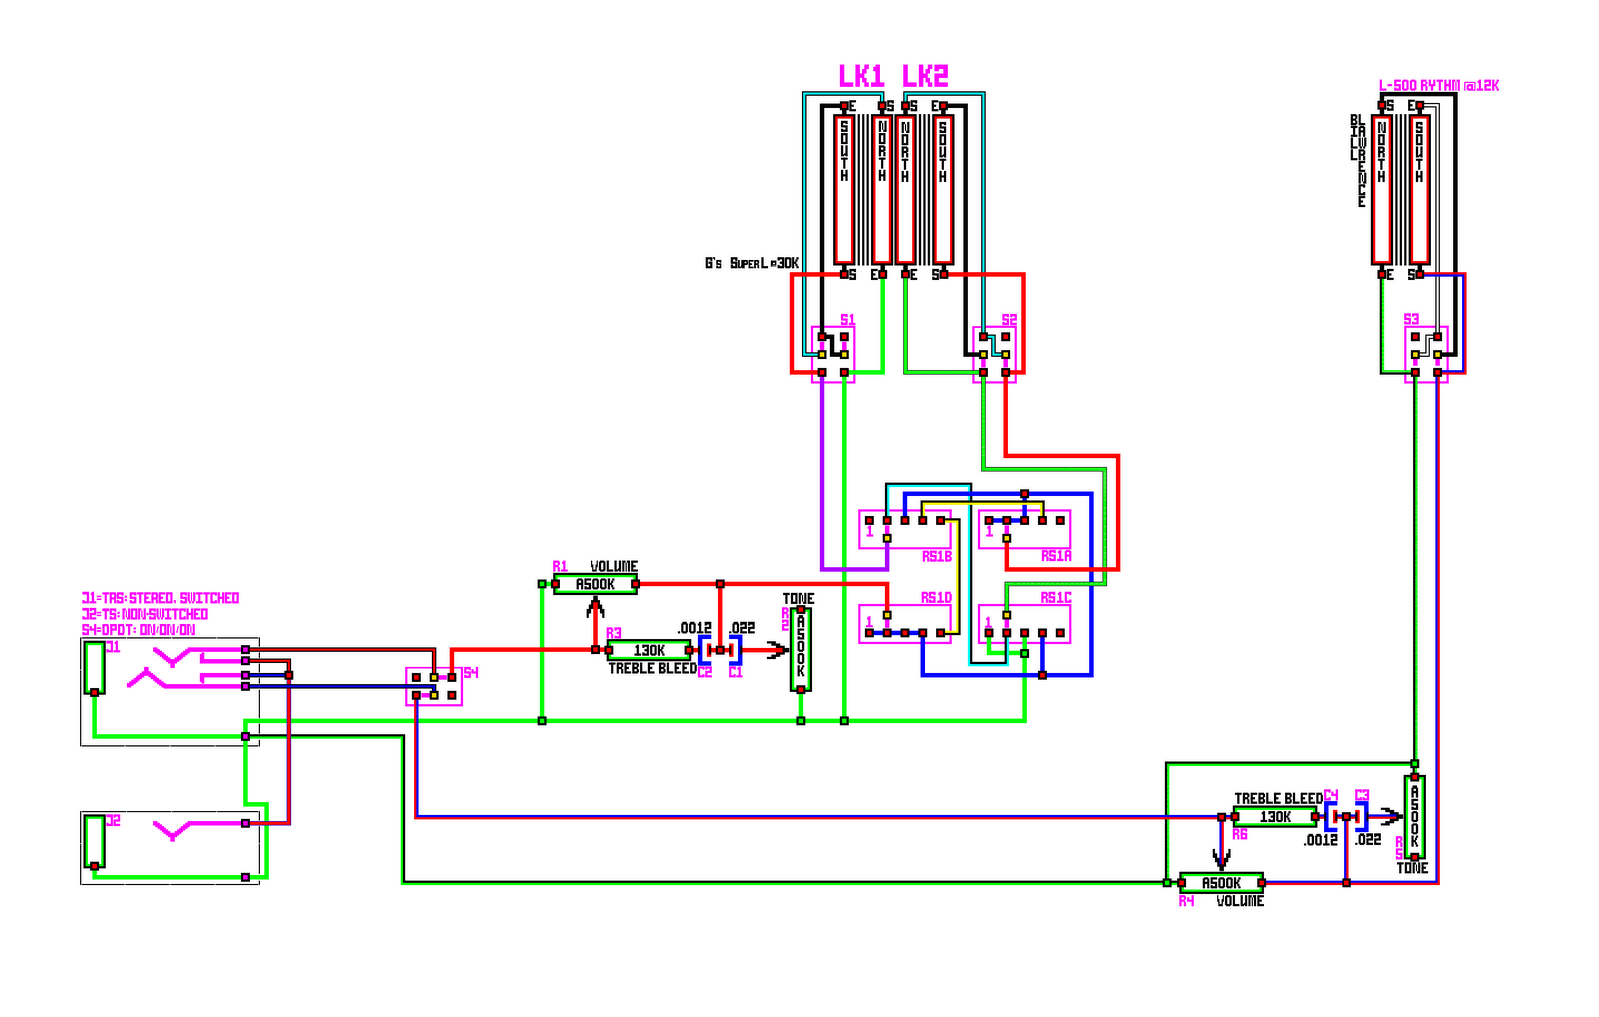
SuperL Installed W/L-500

SuperL Installed W/L-500
Schematic

More Detail #1

More Detail #1
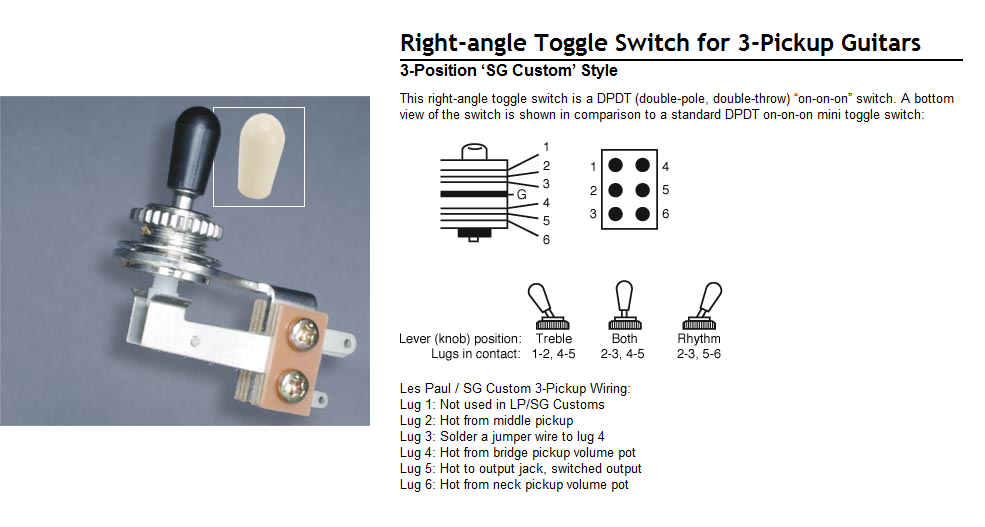
On/On/On Switch & Jacks

On/On/On Switch

On/On/On Switch
stewmac.com

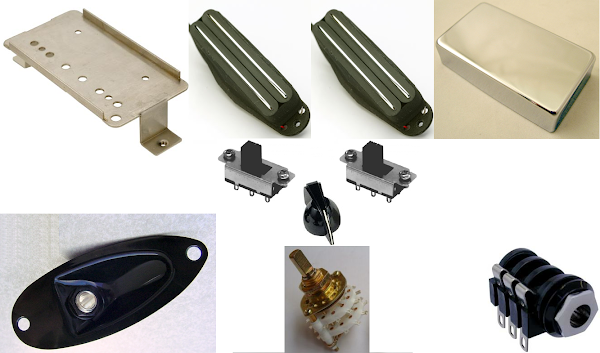
SuperL Bits & Pieces

SuperL Bits & Pieces
2 Dual Blade Single-Buckers

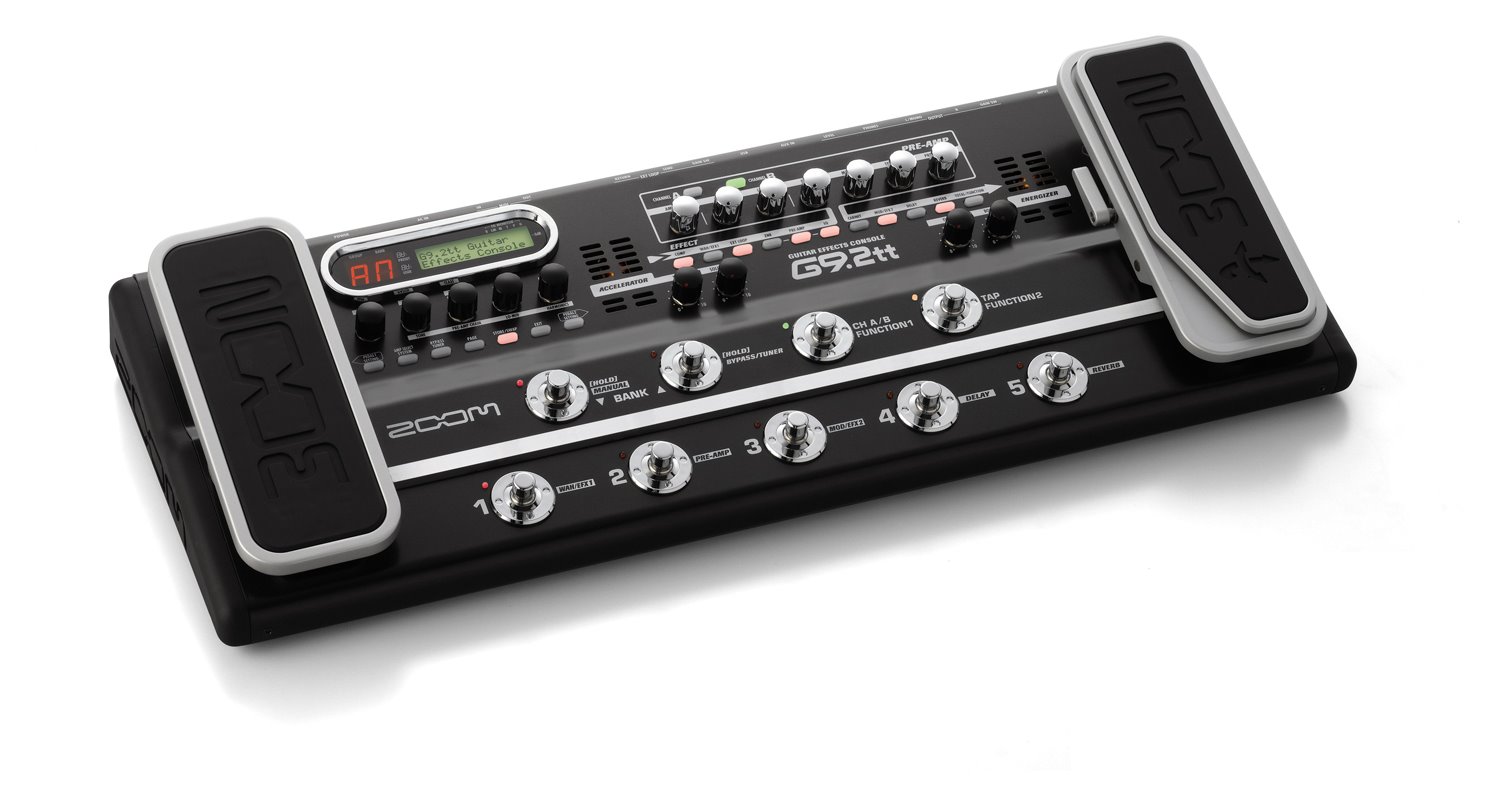
Zoom G9.2tt

Zoom G9.2tt
My Next G.A.S. Attack